


A Beautiful Sunroom Reveal + 11 Steps To Help You Choose The Right Contractor
- Admin
- May 2, 2021
- 7 min read

Updated: Oct 10, 2021
The sunroom is quite clearly one of our favorite rooms in the house, for obvious reasons: sun-filled, comfortable, beautiful . . .as soon as I saw it, even in its original form, I knew it could be special and the place we'd start each day due to its location near the kitchen.
From looking at old, blurry photographs, we could tell this room was not part of the original construction of the house.

A porch was added to the back of the house some time after the house was built. We learned from the Grandson of the original owners who had passed, that their son took up residence and enclosed the porch with glass to create his “winter room” to keep warm. Here is what the sunroom looked like when we purchased the house.


Needless to say, we were left with quite a mess. We immediately got started with the cleanup.

Once the cleanup began, we could tell we were dealing with a brick floor that was in really good shape structurally, which was helpful. None of my designs were finalized at that point, so I was contemplating trying to make the brick work with the design direction I was headed.
Our plans for this room were to:
Replace all of the glass with new sliding French doors;
Remove the window between the sunroom and main powder bath;
Expand the opening into the new kitchen;
Remove a tiny powder bath for better flow to the garage access and side entrance;
Close up access to an existing closet to allow the closet to become a new wet bar at the great room.

As my design plans came together, I decided that a brick floor just wasn't going to work with my new aesthetic. Additionally, the idea that there was a step down to enter this room wasn't ideal. (It was required when the porch was originally constructed because it was an exterior space.) To bring a better flow to adjacent spaces, and to increase safety by eliminating a tripping hazard, I made the decision to have the floor height brought up to match the other rooms down stairs.

The steel supports were removed and the brick and concrete base were jackhammered to make way for new steel supports and doors, and to enable the floor height to be brought up.

Unfortunately, there was an error with ordering the new structural steel and the sunroom was left in this state for months, with brand new doors propped up around the job site for even longer. (Insert tremendous frustration, way more than I'm telling you.)
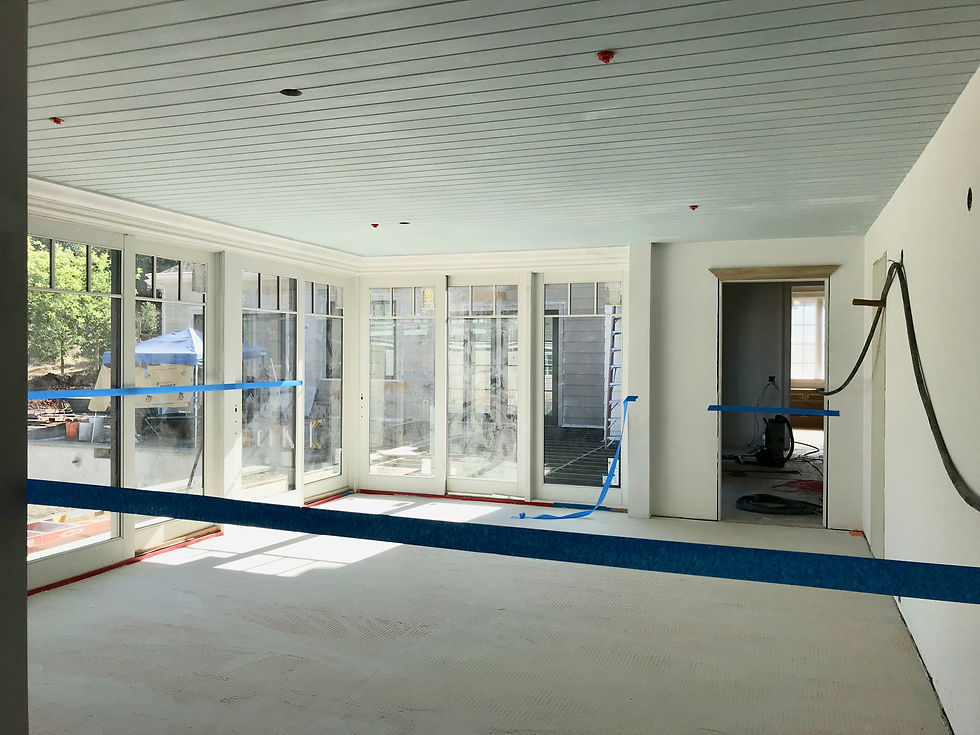
Once the correct steel arrived, walls and doors were installed, including that boxed vertical beam to the right, NOT right. The architect was missing from the project before construction began, and in the wake of that decision were a host of challenges we were faced with. Certain "results" either needed to be accepted and/or disguised with design to be less noticeable. (Insert tremendous stress.) The good news was that the floor height had been brought up and the increased flow and better accessibility into this room was exciting. Also, I had the guys install a V-groove paneled ceiling in this space. It added visual texture, it helped to achieve the idea I wanted it to appear to have been part of the original construction, it matched the adjacent kitchen ceiling detail, added charm, and honestly, it just made the room look more interesting.
Next up . . .

the tile floor installation began. The design and aesthetic choices for this entire project came really easily to me; however, I struggled with whether to install a 12 x 12 patterned floor tile, or to choose a large gray 12 x 18 slate floor tile. The slate would give it an elevated traditional feel mimicking large, stately country homes, but the patterned tile would bring added visual texture and tie in with my largely black and white theme. It would also provide for easier maintenance and better durability moving forward. I was nervous but ultimately went with the pattern, and I couldn't love it more! I had it installed on the diagonal because it changed the visual at all entrance points and it invites your eye to take in the beautiful view out in the new courtyard. I selected a black grout because I knew this room would receive a lot of foot traffic and I didn't want to deal with stained grout.
I interrupt this post for the following:
After last week's post, a number of you sent emails saying you’d like to hear about what happened during the construction process. Some of you said you wanted to know what lessons we learned so you could avoid making the same mistakes with your own upcoming remodels, and one of you said you just needed to hear something juicy in your life (you know who you are! ha ha.) To satisfy inquiring minds, and to probably provide a little therapy for myself, I will be including a segment each week on “Home Renovation Lessons We Learned”. So, without further ado, here is lesson number one.
home remodeling lesson #1:
RESEARCH YOUR CONTRACTOR
One of the most important, if not THE MOST important element of any construction/remodeling project is to choose the right contractor. I knew this, and I thought we were in good hands. For this project, we went back to a contractor we worked with more than 15 years prior. We had a great relationship with them, and they did a great job for us. We called up the owner to discuss the project, met and toured some properties, got initial budget estimations, and discussed our vision and scope of the project. We felt very comfortable we’d receive the same experience and quality job we had before. We knew we’d pay more to go with this contractor, but because this was truly our dream project, and the journey and end result were so important to us, we were okay with paying a little more. Had we done our research, we would have learned that, while the owner was still there, the company was under new leadership, and it wasn’t good.
ADDITIONAL ACTIONS WHEN CHOOSING THE RIGHT CONTRACTOR
Make sure you talk with all of their clients from a consecutive list, not just cherry picked ones they provide. If the list isn't consecutive clients, there is probably a good reason.
Interview management team. Ask hard questions. If they’re uncomfortable answering, you don’t want to work with them.
Do a background check with the Better Business Bureau and other agencies for any red flags.
Get a referral from someone you know who has had a good experience with a contractor.
Tour a contractor's past projects to understand if the quality meets your requirements.
Don't take the easy route because it's less work during a stressful time. Put the time and energy in to finding the right contractor for you and your project.
No what you're signing. Have an attorney review your contract and make any necessary adjustments to protect you.
Ask questions and understand their business systems: billing method, fees, change orders, scheduling system, time frame deliveries, etc. Clearly learn what to expect.
Get a list of subcontractors they partner with. Interview them and do background checks.
Don't hire an architect just because your contractor recommends them. Apply same lessons above to hiring all project professionals.
TRUST YOUR GUT! The construction industry is known for challenges and your job is to avoid as many as possible, because mistakes can be costly.
To satisfy my “juicy” reader, here is a snippet of a conversation captured on a job site security camera between the first project superintendent and a subcontractor early in the project. Note: He was not originally scheduled to be the superintendent on our project. The contractor brought him in as a temporary. It was clear almost immediately he wasn't capable nor qualified, and despite the contractor being informed of the tremendous errors and mistakes he made, they kept him on, resulting in a hit to the budget, timeline, and quality of workmanship. He was eventually removed from the project.

There will probably be some blowback from the company VP for me sharing this, but I FINALLY DON’T CARE. Anyone who seemingly gloats on the job site about how many times he’s been arrested and how many fights he’s been in, will just have to deal with the truth. Wooosh! I feel better! I’ve held that in for way too long. Thanks Juicy!
Now, back to the regularly scheduled programming.
Meet Mrs. Colonial's new and improved sunroom.

This light filled space is magical. It envelopes you with warmth in both a winter afternoon or a summer morning. I believe that to be successful, a room has to have an essence - a combination of elements that work so harmoniously together that they inspire your senses. I capitalized on the inherent features this room already had, i.e., light, views, square footage, orientation, etc., and then introduced a subtle energy with contrasts. I then married that contract with neutrals in both furniture and paint to bring in an airiness that makes anyone feel good.

The neutral color palette is in keeping with the interiors throughout the rest of the house. I brought a splash of yellow to this room to welcome in Spring, and to increase its warmth and cheer. You'll see Carrera marble used throughout the house. I love it because it's timeless, and using it in multiple spaces inserts familiarity has you move from room to room.

On the wall opposite the wall of windows, I brought in a vintage table and art, and paired it with industrial style sconces, and a modern lamp. This area is a passage way from the kitchen to the great room so I wanted to keep it minimal.
This table is older than I am. It was in my childhood home, and more recently at my Mom's home on a back porch, so it received some punishment from both time and the elements. I thought about refinishing it, but instead decided to keep it as is to bring in an element of longevity which helped make the new space feel comfortable and lived in.

With glass walls on both the South and West facing walls, the sunlight changes throughout the day. This is from late afternoon when the room is bathed in sun. It it nothing less than glorious.

And the views, did I mention the views?

They never get old. This is definitely the AFTER. Below is the BEFORE

Another before.

And an after.

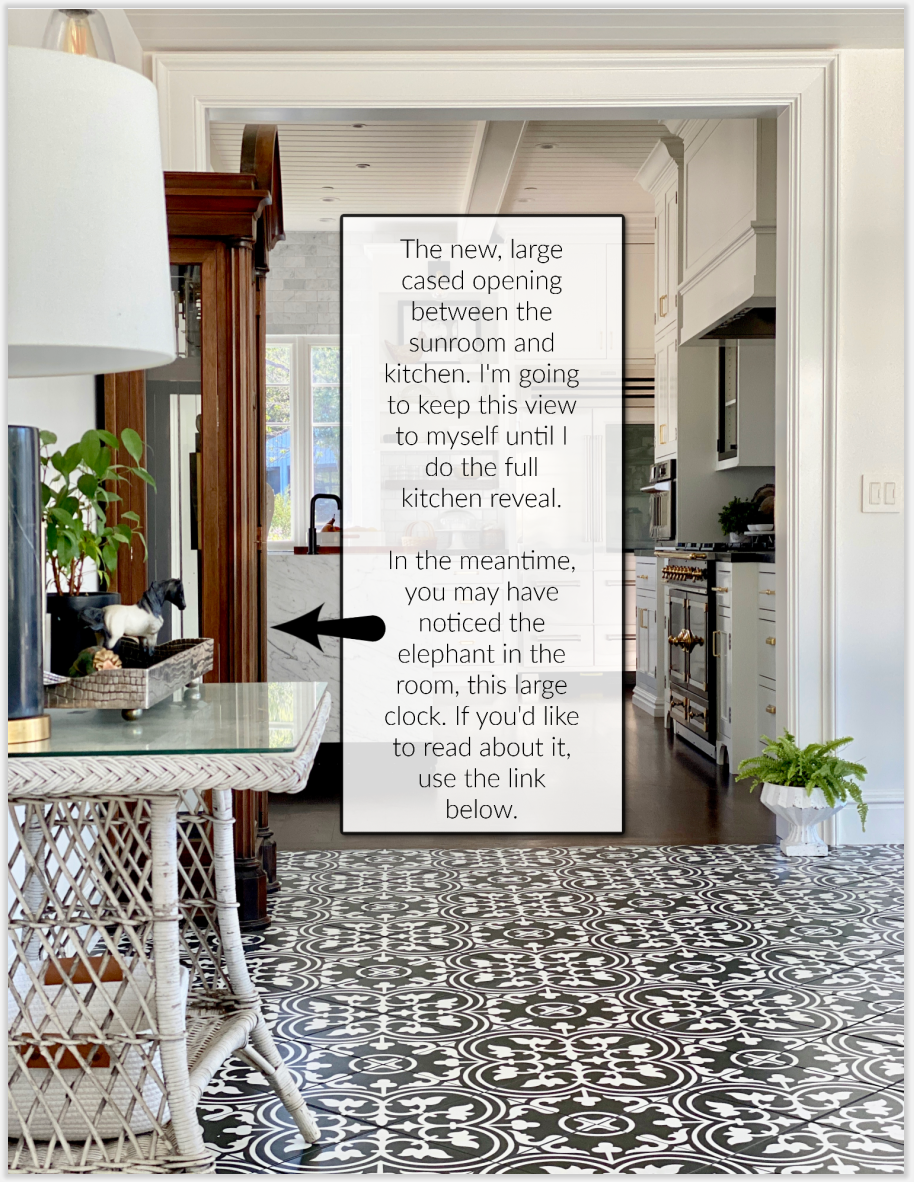
What's up with the clock?
If you'd like to see sources for any of my rooms as I reveal them, you can go to the Sources tab on my website and search for the room you're interested in.

I hope you enjoyed my tour of the sunroom through photos today, and that my "Home Renovation Lessons We Learned" is helpful for your own future renovation projects.
Before I go, I wanted to let you know some exciting news. We haven't been able to host any real gatherings here at the farm due to Covid. However, I am pleased to say we are going to be hosting our first shin dig at the new Taj Ma Garage toward the end of summer. I will give you more details as I have them. Hopefully, if you're local you'll be able to join us and help us to finally share the fruits of our blood, sweat, and tears and to celebrate an exciting future on the farm. CHEERS my friends!
Sandy Sheldon


Comments